 Pin It
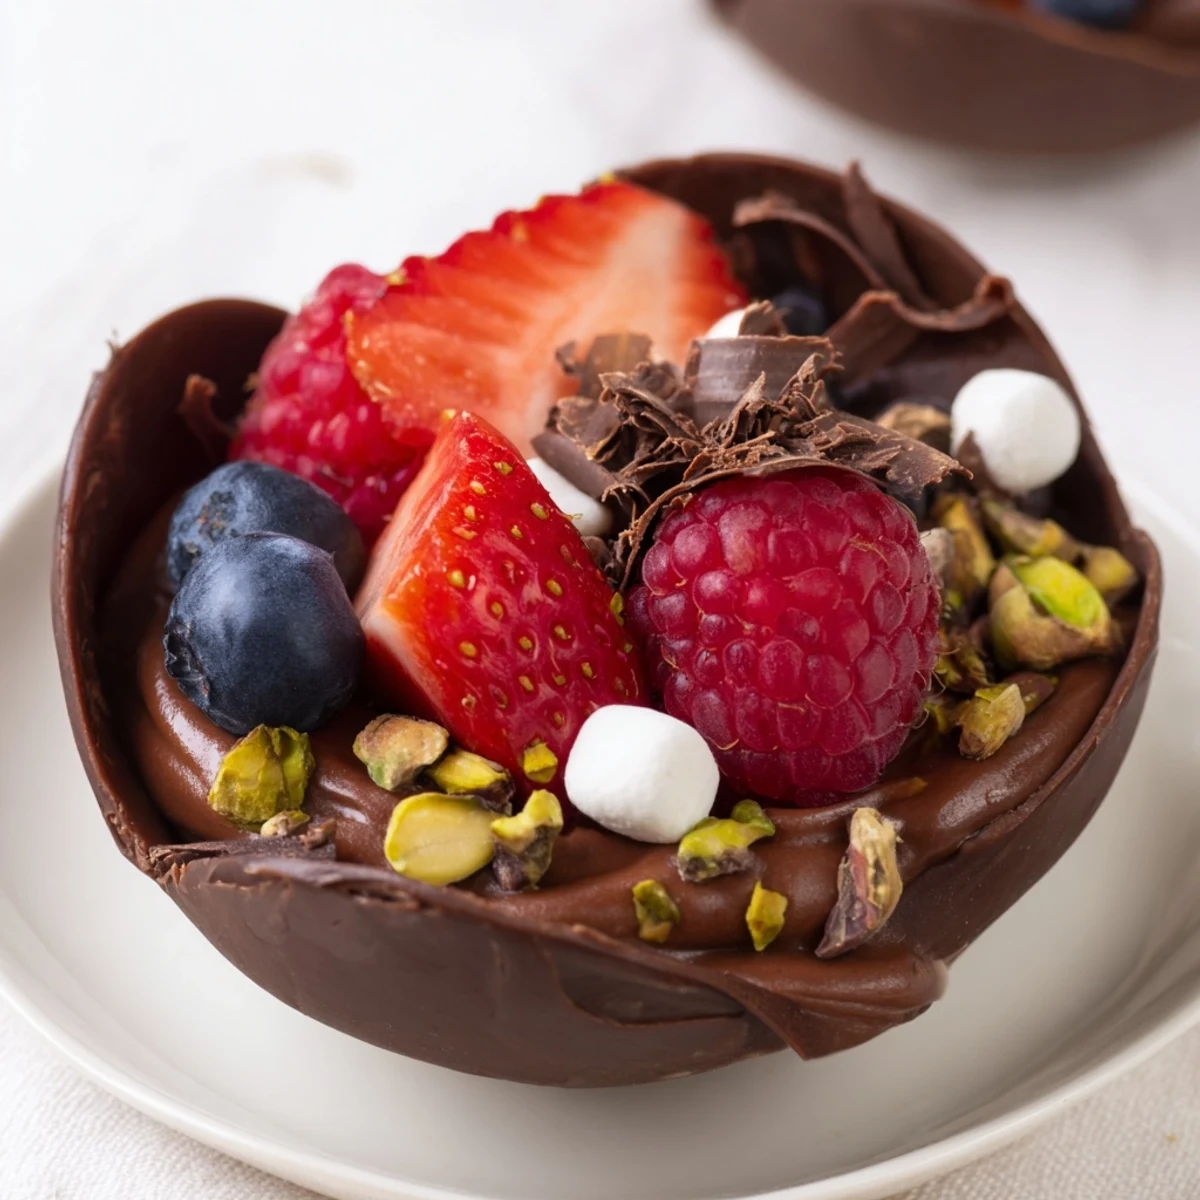
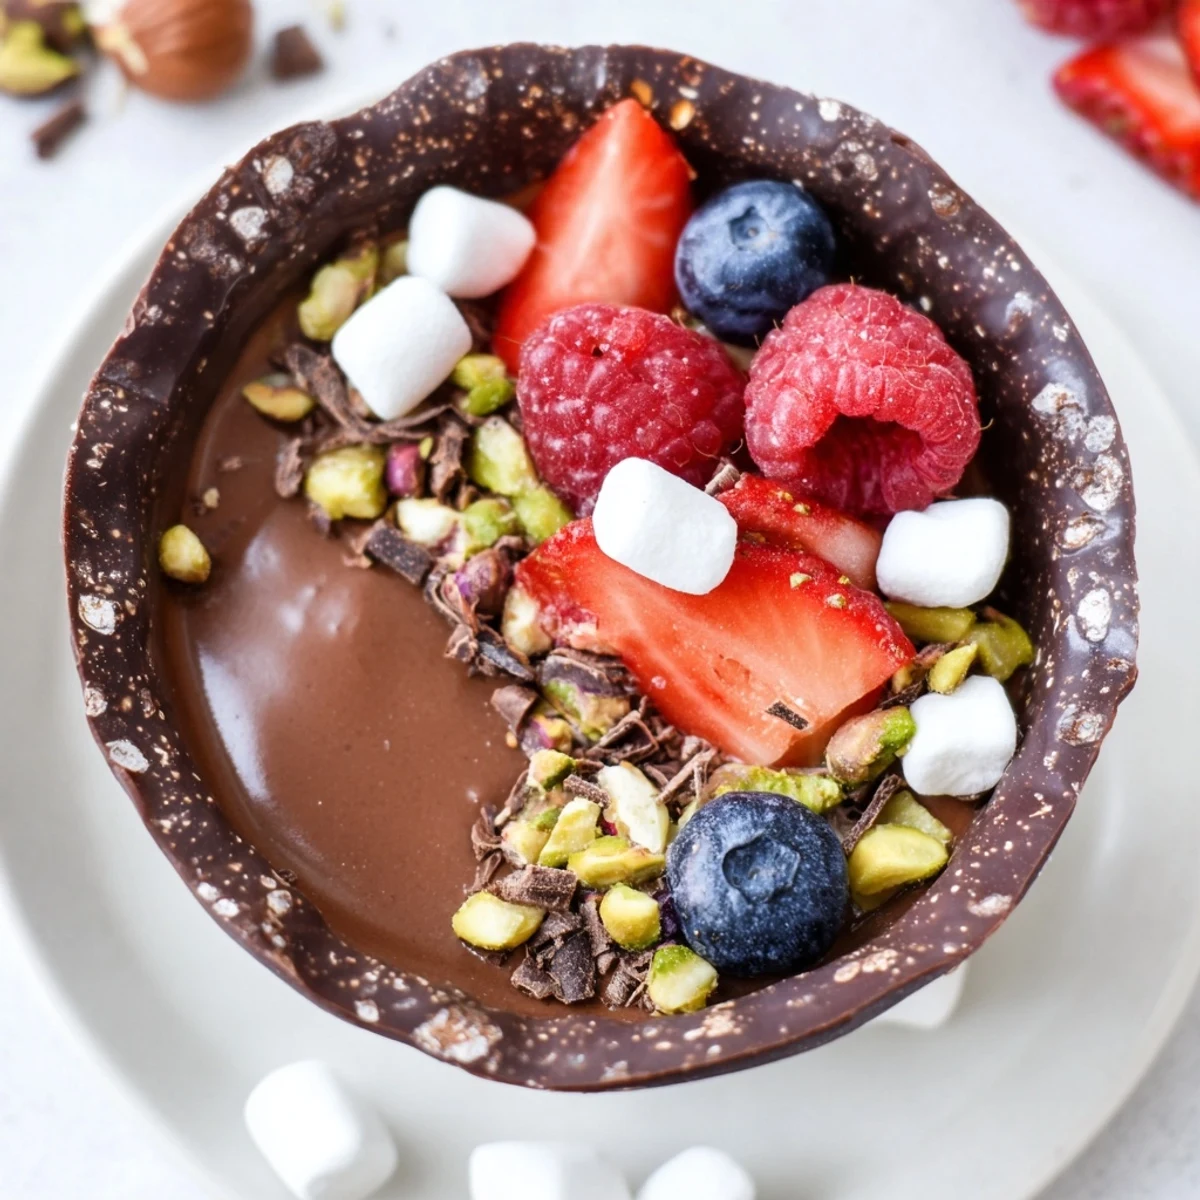
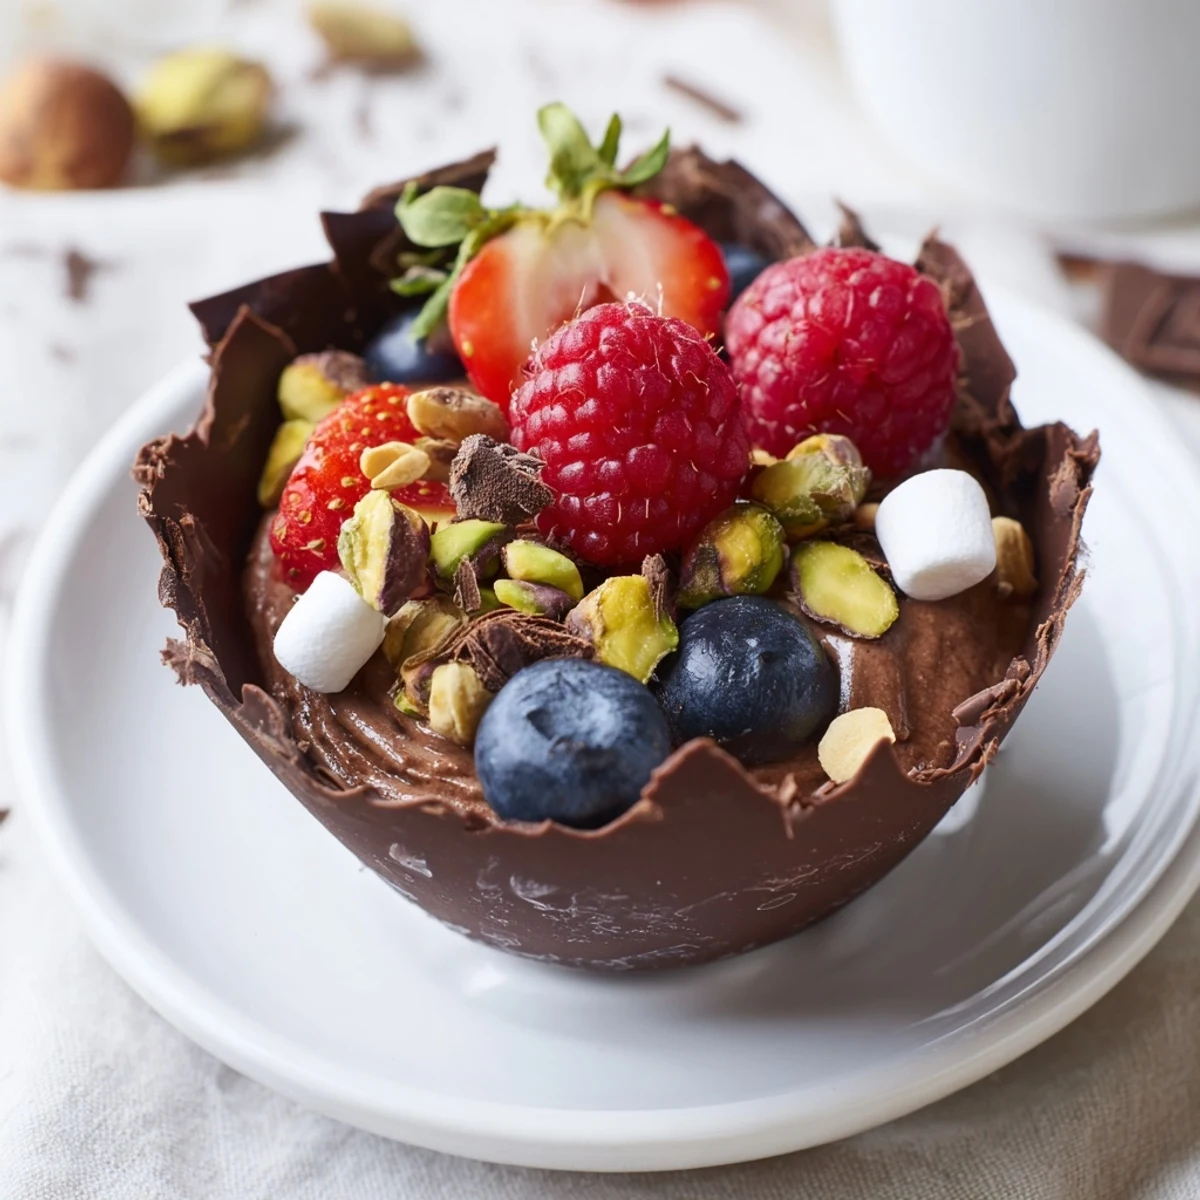
 These sophisticated chocolate grazing cups combine homemade dark chocolate vessels with silky chocolate mousse, fresh mixed berries, and artisanal toppings like chopped nuts, marshmallows, and chocolate curls. Each cup offers a luxurious textural experience—crisp chocolate shell, velvety mousse, juicy fruit, and satisfying crunch. The presentation makes them ideal for dessert tables, dinner parties, or special celebrations. With simple assembly and customizable toppings, you can adapt these for any occasion while maintaining their elegant appearance and indulgent taste profile.
The first time I made chocolate cups, my kitchen turned into a crime scene of smeared chocolate and failed attempts. I'd seen these elegant grazing desserts at a wedding and became obsessed with recreating them. After three messy batches, I finally discovered that silicone liners and patience are the real secrets. Now these little cups are my go-to when I want to impress without spending hours in the kitchen.
I served these at my sister's bridal shower last spring, arranging everything on a long wooden board with fresh flowers tucked between the cups. Everyone hovered around the table, choosing their toppings like kids at a candy store. The best part was watching my usually skeptical brother-in-law go back for thirds.
Ingredients
- Dark chocolate: The higher the cocoa percentage, the better your cups will hold their shape at room temperature
- Heavy cream: Very cold cream whips up faster and holds its structure longer when folded into warm chocolate
- Fresh berries: Choose fruits that aren't overly ripe so they maintain their texture against the creamy mousse
- Chopped nuts: Toast them lightly beforehand to bring out their natural oils and crunch
Instructions
- Craft the chocolate cups:
- Melt the chocolate in 30 second bursts, stirring between each. Brush a generous layer into your cupcake liners, rotating to coat evenly. Let them set in the fridge for at least 20 minutes before carefully peeling away the liners.
- Whip up the mousse:
- Melt the remaining chocolate and let it cool until just slightly warm. Whip the cold cream with sugar and vanilla to soft peaks, then fold a dollop into the chocolate before gently combining both mixtures.
- Build your masterpiece:
- Pipe the mousse into each chocolate cup, filling them about two-thirds full. Top with berries, nuts, marshmallows, and any decorations that catch your eye.
- Let them rest:
- Chill the assembled cups for at least 20 minutes so the flavors meld and everything sets beautifully.
 Pin It
 These became a Christmas tradition in our house after I made them for a holiday party three years ago. Something about the combination of rich chocolate and fresh berries feels festive, yet they're light enough that nobody feels too stuffed afterward.
Chocolate Temperature Matters
I've learned the hard way that overheated chocolate becomes grainy and impossible to work with. Use short intervals in the microwave and stir religiously, or set up a proper double boiler if you want extra control. The chocolate should feel barely warm to the touch when it's ready.
Making Ahead Strategy
The chocolate cups can be made two days in advance and stored in an airtight container with parchment paper between layers. The mousse is best whipped the same day you plan to serve, but you can have all your toppings prepped and ready in small bowls the night before.
Presentation Ideas That Wow
Arrange your completed cups on a slate board or large wooden platter with fresh mint leaves and extra berries scattered between them. I like to put small bowls of the various toppings alongside so guests can add more of whatever they love most.
- Clear glass cups underneath the chocolate shells create a stunning floating effect
- Edible flowers like pansies or violas add an unexpected pop of color
- Keep everything cold until the last possible moment for the best texture
 Pin It
 There's something magical about handing someone a chocolate cup and watching their face light up. These aren't just desserts, they're tiny experiences meant to be savored slowly.
Recipe FAQ
- → Can I make the chocolate cups in advance?
-
Yes, prepare the chocolate cups up to 2 days ahead and store in an airtight container at cool room temperature. Avoid refrigeration as condensation can cause blooming. Assemble with mousse and toppings shortly before serving for optimal texture.
- → What chocolate percentage works best for the cups?
-
Dark chocolate with 60-70% cocoa provides ideal structure and flavor balance. Higher percentages create sturdier cups but may be too bitter for some palates. Milk chocolate can work but creates softer, more fragile vessels.
- → Can I substitute the heavy cream in the mousse?
-
Coconut cream makes a delicious dairy-free alternative, though the mousse will set slightly firmer. For lighter versions, use half-and-half but expect a less stable mousse. The cream's fat content is essential for proper aeration and texture.
- → How do I prevent the chocolate cups from cracking?
-
Ensure your chocolate is properly tempered—melt gently to 45°C, cool to 27°C, then reheat slightly to 31-32°C before coating. Apply thick, even layers and chill thoroughly before removing liners. Work in a cool room away from direct sunlight.
- → What other toppings can I use?
-
Consider crushed cookies, caramelized nuts, fresh mint leaves, shaved coconut, citrus zest, candied fruit, or edible flowers. Savory elements like sea salt or crushed pretzels create sophisticated flavor contrasts. Match toppings to your occasion and flavor preferences.
- → Can I make these without silicone liners?
-
Small paper cupcake liners work well and peel away easily after setting. For permanent molds, use small silicone molds or even inverted pudding basins coated with chocolate. Paper liners offer the easiest release for beginners.