 Pin It
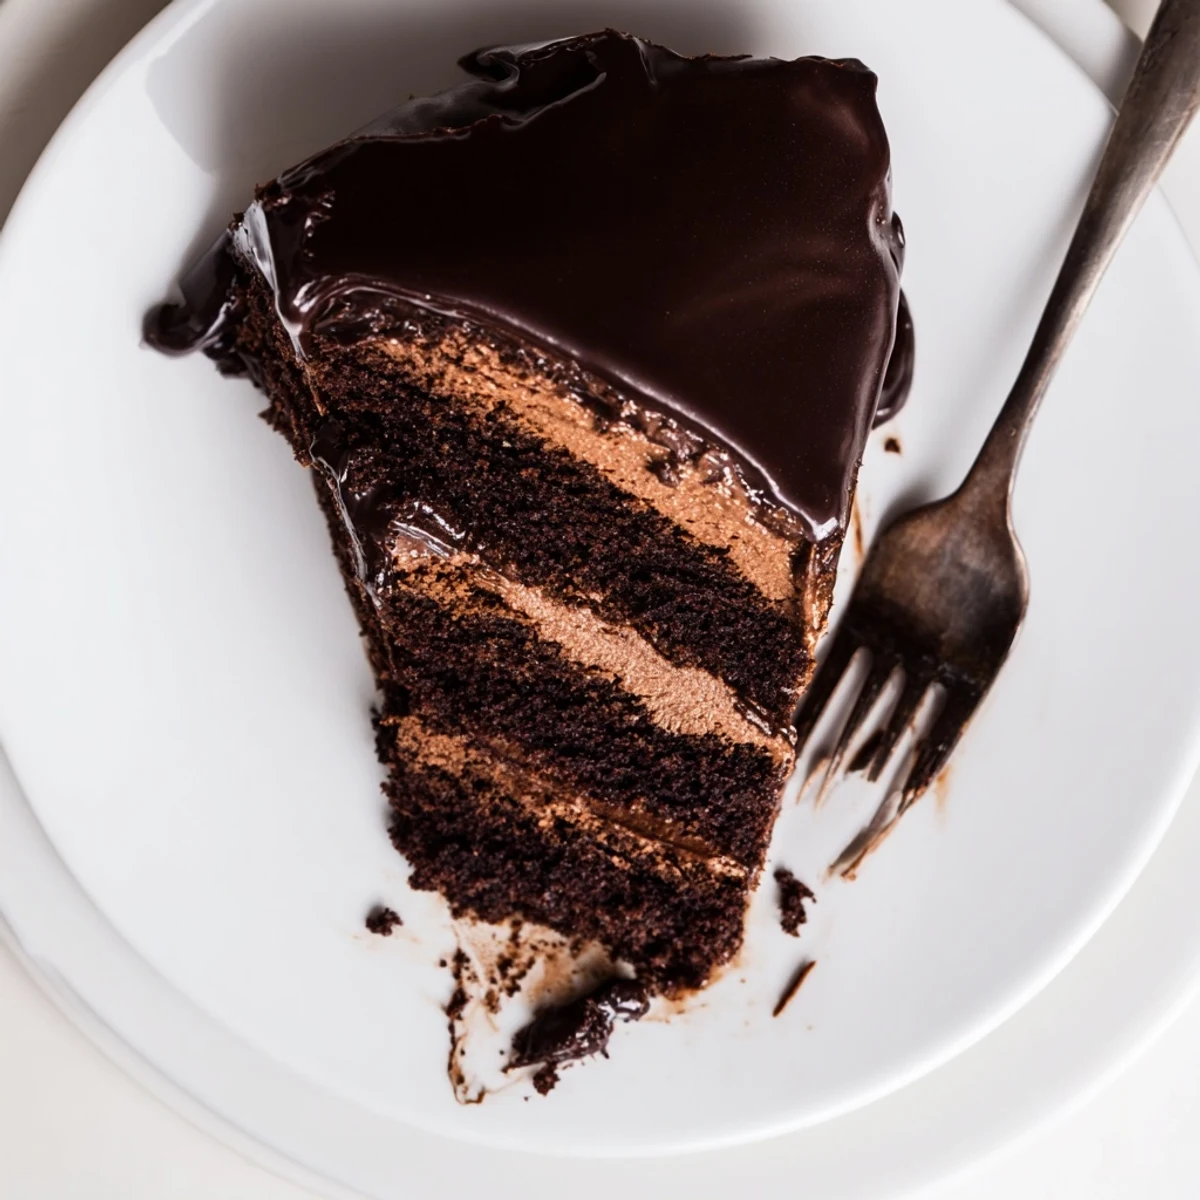
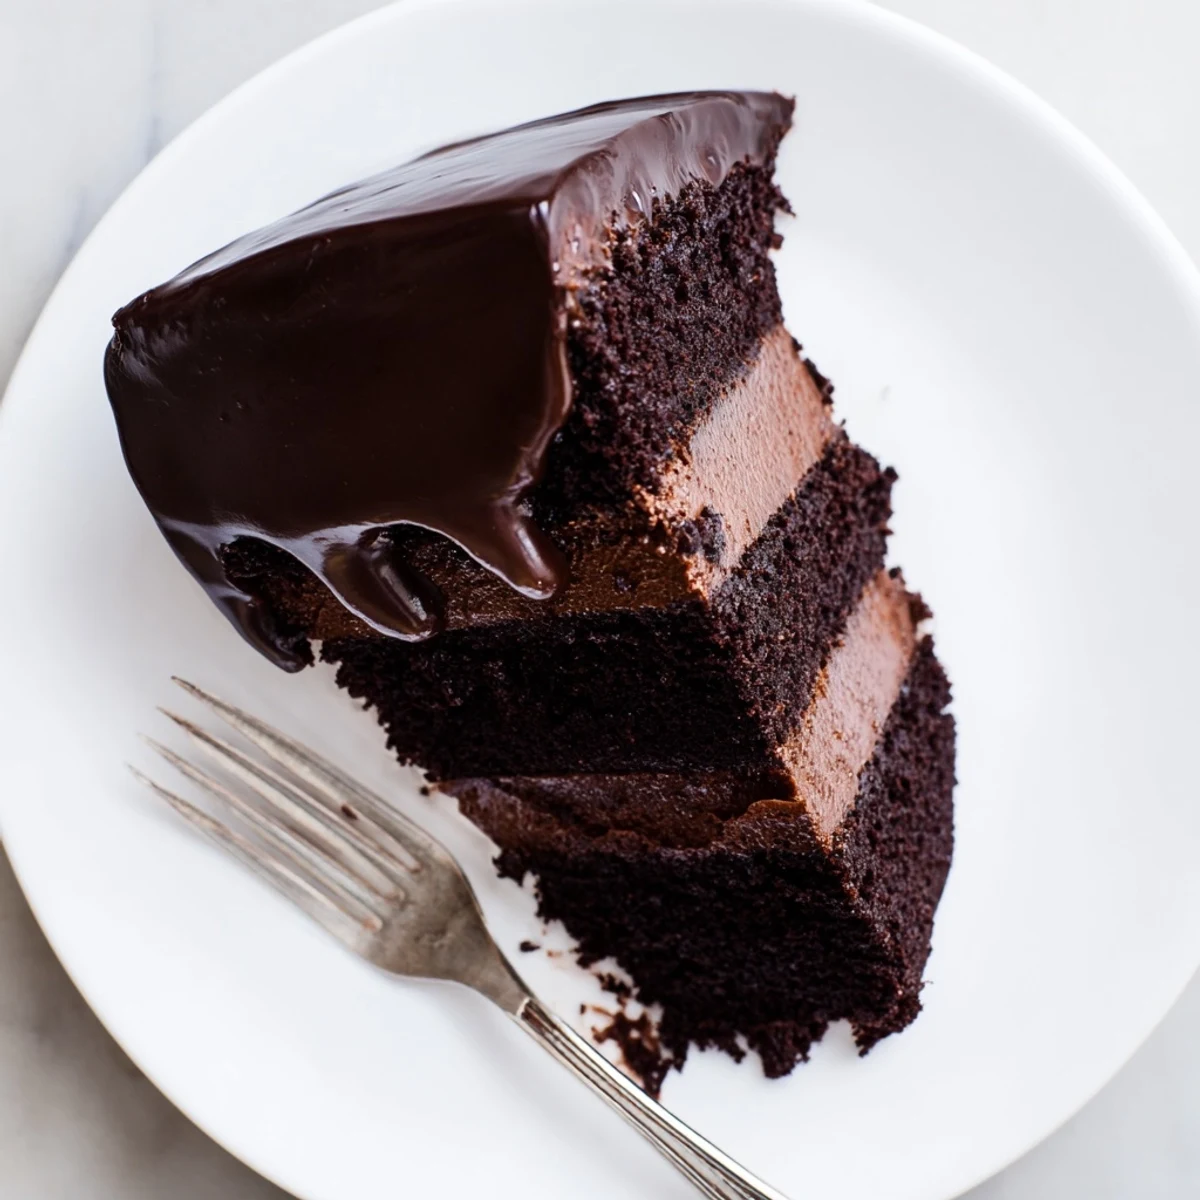
 This elegant French dessert combines three luxurious chocolate elements into one stunning creation. A light, moist sponge forms the foundation, supporting a cloud-like dark chocolate mousse that melts beautifully on the tongue. The entire creation is crowned with a mirror-like chocolate glaze that adds both visual drama and intense flavor depth.
While this showstopping dessert requires several chilling periods, the hands-on techniques are straightforward. The mousse uses a traditional French method with sweetened egg yolks and whipped cream, creating an exceptionally smooth texture. Perfect for dinner parties or special occasions, this cake tastes even better when made ahead, allowing flavors to mature and the mousse to set properly.
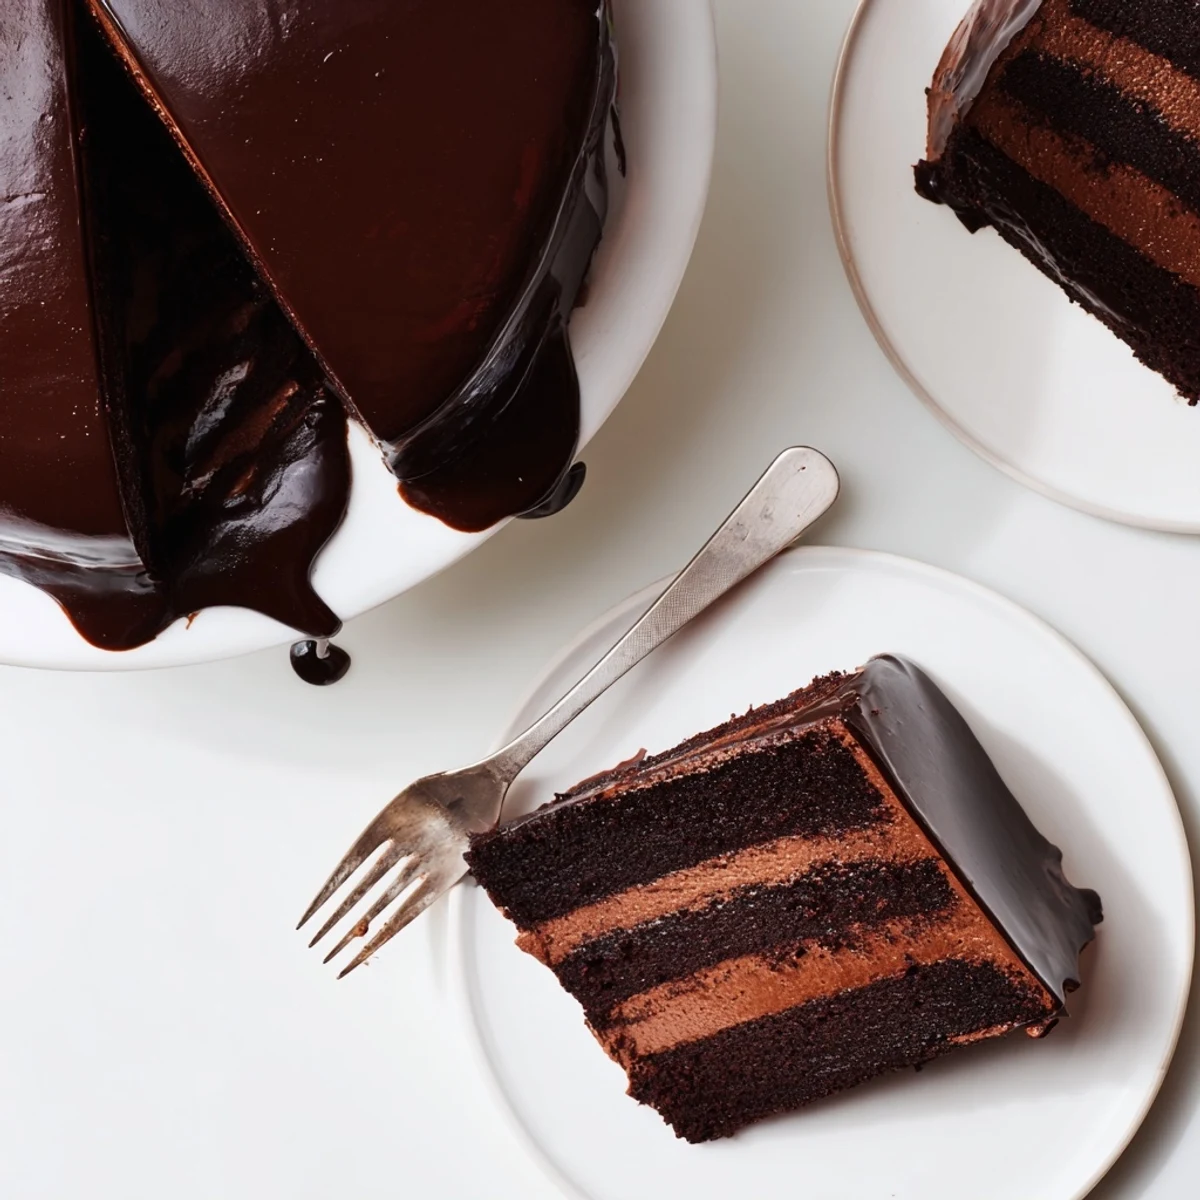
The first time I attempted this cake, I forgot to line the springform pan and spent twenty minutes coaxing cooled sponge out with a butter knife. Lesson learned. Now it's become my go-to dessert for dinner parties because it looks impressively architectural but actually rewards patience more than skill. There's something deeply satisfying about building those distinct layers and watching glossy glaze cascade down the sides like chocolate silk.
I made this for my sister's birthday last winter and watched four grown adults go completely silent after the first bite. She kept texting me about dreams involving that mousse layer for weeks afterward. Now it's become the official family celebration dessert, appearing whenever something worth marking happens.
Ingredients
- 3 large eggs: Room temperature eggs incorporate air more readily, giving your sponge that essential lift
- 100 g granulated sugar: Don't reduce this, sugar provides structure as well as sweetness
- 80 g all-purpose flour: Sift it first to avoid stubborn lumps in your cocoa mixture
- 20 g unsweetened cocoa powder: Dutch-processed gives a deeper, darker color and milder flavor
- 1/2 tsp baking powder: The insurance policy that keeps your sponge from collapsing
- 1/4 tsp salt: Chocolate craves salt to make its flavors sing
- 30 ml whole milk: Adds tenderness to the sponge crumb
- 30 ml vegetable oil: Keeps the sponge moist longer than butter would
- 1 tsp vanilla extract: Pure extract makes a noticeable difference here
- 250 g dark chocolate: Splurge on good chocolate, it's the backbone of the entire dessert
- 400 ml heavy cream: Cold cream whips faster and holds air better
- 3 large egg yolks: Pasteurized if you're worried about raw eggs
- 60 g granulated sugar: For the mousse base, dissolved into syrup first
- 2 tbsp water: Creates the sugar syrup that cooks the yolks
- 1/2 tsp vanilla extract: Rounds out the chocolate intensity
- Pinch of salt: Just enough to wake up all the flavors
- 120 g dark chocolate: Same quality as the mousse chocolate
- 80 ml heavy cream: Warm this slowly, scorching ruins the glaze
- 1 tbsp unsalted butter: Gives the glaze that professional sheen
Instructions
- Prep your pan and oven:
- Pan failure haunts me, so parchment paper that creeps up the sides is non-negotiable. Preheat to 350°F with the rack positioned dead center.
- Combine the dry ingredients:
- Whisk flour, cocoa, baking powder, and salt in a bowl. Set aside where you can grab it quickly.
- Whip the eggs and sugar:
- This is where the magic happens, so don't rush it. Five minutes on high speed until it's pale and voluminous—think three times the original size.
- Fold everything together:
- Sift dry ingredients over the eggs in three additions, folding with a figure-eight motion. Drizzle in milk, oil, and vanilla last, mixing until just combined.
- Bake the sponge:
- Eighteen to twenty minutes is the sweet spot. A toothpick should emerge clean, and the cake should spring back when touched gently.
- Melt the chocolate:
- Double boiler method saves you from seized chocolate disasters. Stir until glossy, then let it cool slightly while you work on the yolks.
- Make the sugar syrup:
- Dissolve sugar in water over medium heat, watching closely. You want it simmering but not coloring.
- Temper the egg yolks:
- Whisk yolks constantly while streaming in hot syrup. Keep whisking until the mixture is pale, thick, and cooled slightly.
- Combine chocolate and yolks:
- Fold melted chocolate into the yolk mixture along with vanilla and salt. Set aside while you whip the cream.
- Whip and fold the cream:
- Soft peaks are your target—stiff peaks make folding a nightmare. Lighten the chocolate base with one-third of the cream first, then fold in the rest gently.
- Build the foundation:
- Clean your springform pan and reassemble it around the cooled sponge. This ring is what keeps your mousse contained while it sets.
- Add the mousse layer:
- Pour the mousse over the sponge and smooth the top. Refrigerate for at least four hours, or overnight if you have the self-control.
- Make the glaze:
- Heat cream until it's barely simmering, then pour over chopped chocolate and butter. Let it sit for one full minute before stirring into glossy perfection.
- Glaze the cake:
- Release the cake from the pan and set it on a wire rack over parchment. Pour glaze in the center and let it flow naturally toward the edges.
- Final chill:
- Thirty minutes in the fridge sets the glaze beautifully. Slice it with a knife dipped in hot water for clean edges.
 Pin It
 This cake has become my secret weapon for stressful weeks. There's something meditative about the process, and pulling that finished masterpiece from the fridge makes everything feel manageable again.
Mastering The Sponge
Underbeating the eggs and sugar is the most common mistake I see. You want that mixture practically cascading off the whisk in ribbons before you proceed. It takes longer than you think, but that aeration is what prevents a dense, disappointing sponge.
Working With Chocolate
Chocolate has a personality of its own and responds badly to rush or heat. I've seized more chocolate than I care to admit by getting impatient. Low and slow, stirring constantly, is the only way to earn that silky consistency.
Assembly And Serving
The springform pan trick changed my relationship with layered desserts. It acts like a mold, keeping everything tidy while the mousse sets up. Serve this slightly chilled, never refrigerator-cold, so the textures can fully express themselves.
- Run a hot towel around the pan ring for easier removal
- Use a serrated knife for the cleanest slices
- Let slices sit at room temperature five minutes before serving
 Pin It
 This is the cake that makes people remember you. It's worth every minute of the process.
Recipe FAQ
- → How far in advance can I make this?
-
This dessert actually improves when made ahead. You can prepare it up to 2 days before serving. Store it in the refrigerator, loosely covered once the glaze has fully set. The flavors develop and the mousse firms up beautifully over time.
- → Can I use milk chocolate instead?
-
While possible, milk chocolate will significantly alter the balance. Dark chocolate (60-70%) provides the necessary intensity to cut through the rich cream and eggs. If you prefer a sweeter version, reduce the sugar slightly and use 50-55% cocoa chocolate.
- → Why must the cream be cold when whipping?
-
Cold temperature is crucial for achieving stable whipped cream. Warm cream won't hold air bubbles properly, causing your mousse to collapse. Chill your bowl and whisk too for best results. Whip just until soft peaks form—overwhipping makes the mousse grainy.
- → Can I freeze this cake?
-
Yes, freeze before adding the glaze. Wrap the mousse-topped sponge thoroughly and freeze for up to 1 month. Thaw overnight in the refrigerator, then glaze before serving. The glaze itself doesn't freeze well as it can develop sugar crystals.
- → Is pasteurized egg necessary for safety?
-
The egg yolks in the mousse aren't cooked, so using pasteurized eggs eliminates any salmonella risk. Look for pasteurized eggs in cartons at most supermarkets. If using regular eggs, ensure they're very fresh and from a reliable source.
- → Why did my glaze turn dull?
-
Dull glaze usually results from getting water in the chocolate or overheating the cream. Make sure all equipment is dry, and heat the cream only until bubbles form around the edges—never a rolling boil. Let the glaze cool to 90-95°F before pouring.