 Pin It
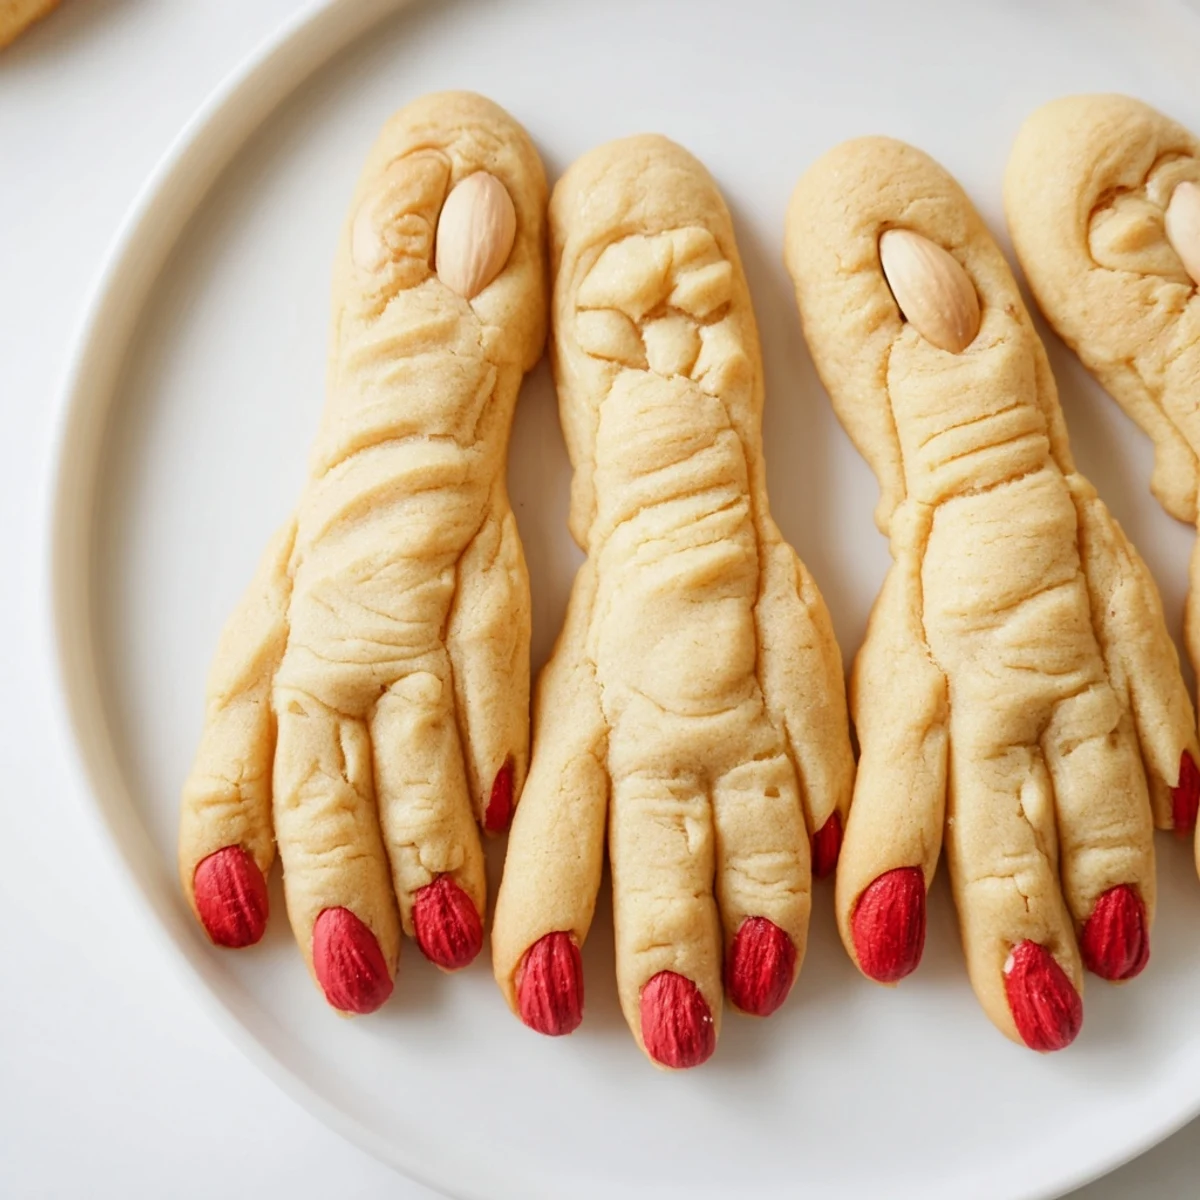
 These spooky witch finger cookies combine buttery almond-flavored dough with creepy details like knuckle lines and bloody fingernails made from red food coloring or jam. Perfect for Halloween parties, these 45-minute treats are easy to shape and customize with green or gray dough tinting. Each batch yields 24 impressive fingers that pair wonderfully with hot cider or spooky cocktails.
The first time I made these, my daughter actually screamed when she opened the cookie jar. That's when I knew these witch fingers were doing their job perfectly. There's something ridiculously satisfying about shaping dough into creepy digits and watching people's faces light up with delighted horror at Halloween parties.
Last year at my office potluck, someone genuinely thought I'd bought a realistic Halloween prop until they took a bite. Watching people hesitantly pick one up, then immediately reach for more after that first taste, has become my favorite October tradition. These cookies have turned me into the Halloween dessert person whether I planned it or not.
Ingredients
- Unsalted butter: Softened to room temperature makes all the difference for that perfectly tender crumb that holds its creepy shape
- Granulated sugar: Creates just the right amount of crispness on the edges while keeping centers soft
- Large egg: Binds everything together and adds richness
- Pure vanilla extract: Don't skip the good stuff here since the flavor really shines through
- Almond extract: This is the secret weapon that makes these cookies taste special and sophisticated
- All purpose flour: The structure builder that lets these fingers hold their shape in the oven
- Baking powder: Gives them just enough lift without puffing up too much
- Salt: Balances the sweetness and makes all the flavors pop
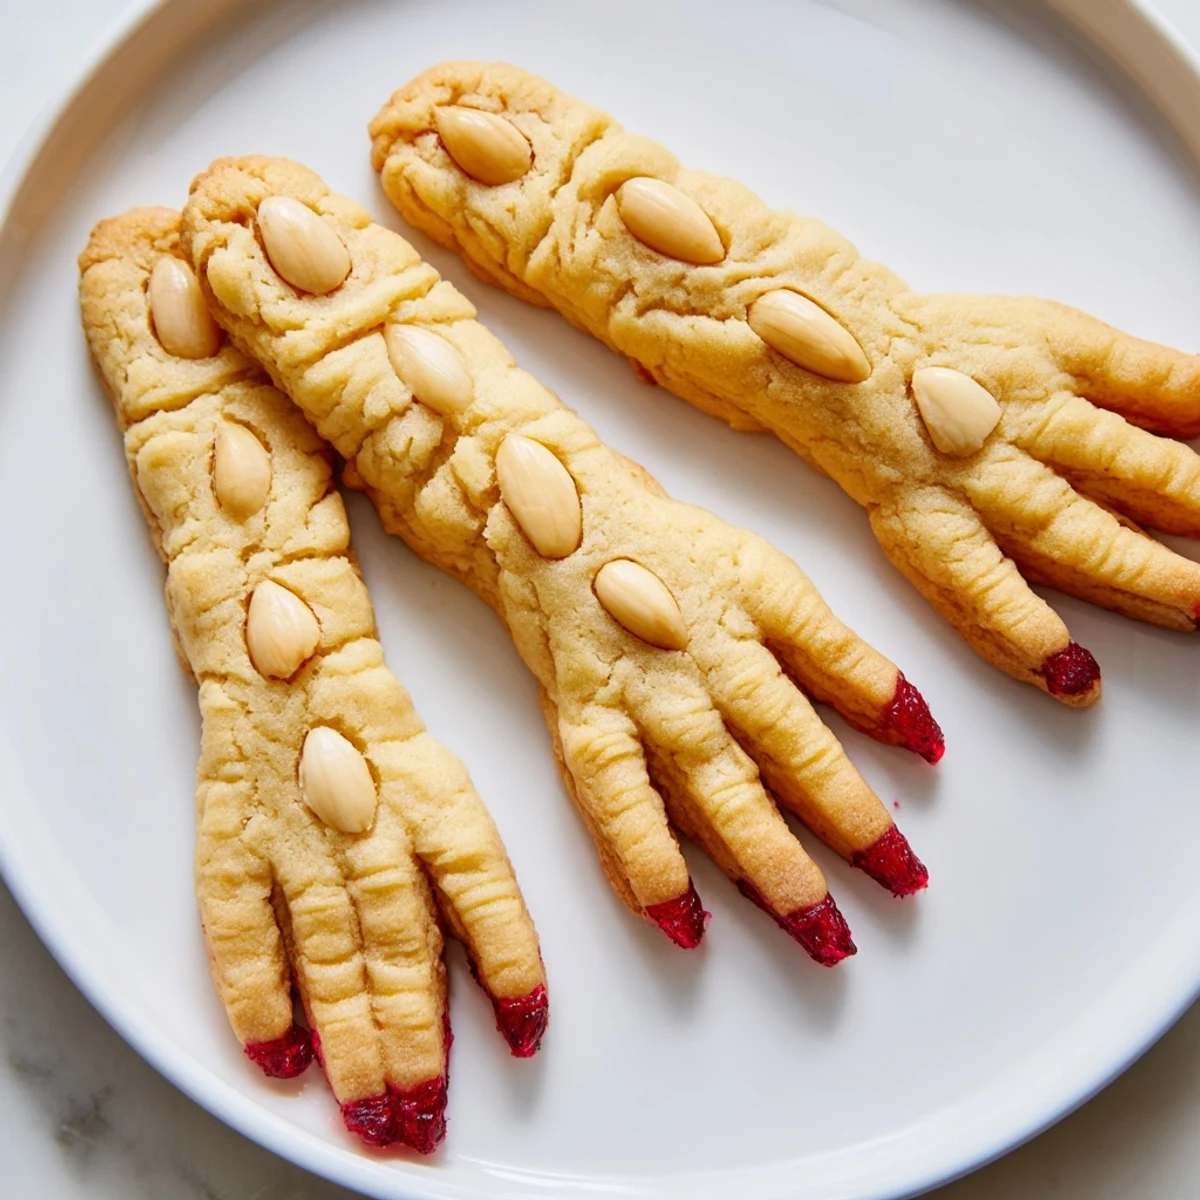
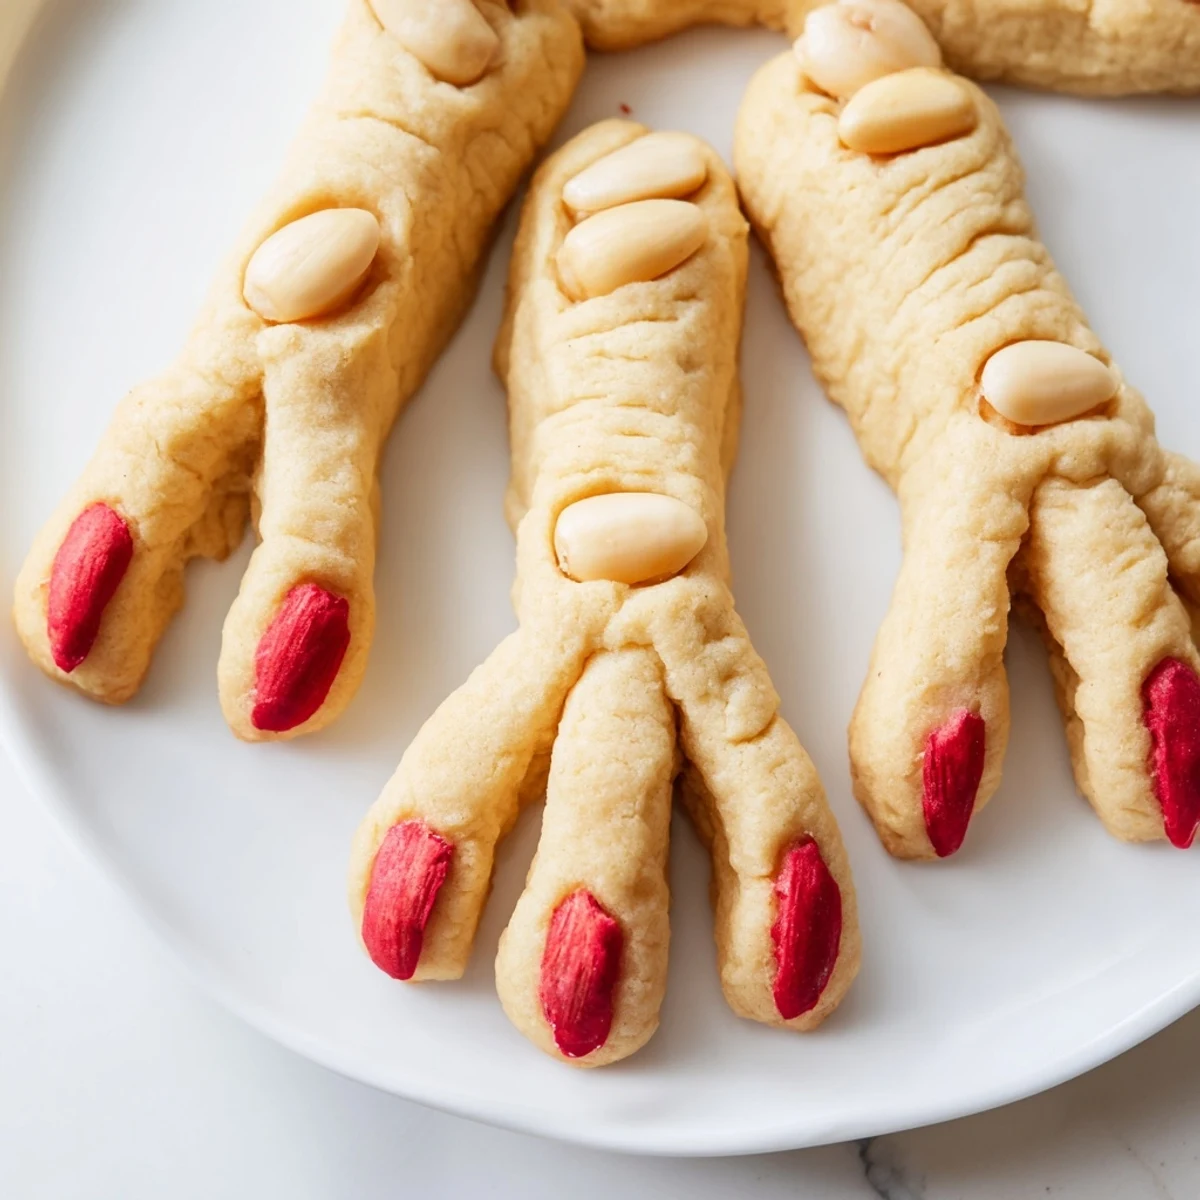
- Blanched almonds: Create perfectly creepy fingernails that look shockingly realistic
- Red gel food coloring: The finishing touch that takes these from cute to absolutely grotesque
Instructions
- Get your oven ready:
- Preheat to 325°F and line two baking sheets with parchment paper so nothing sticks
- Cream the butter and sugar:
- Beat them together until the mixture is light and fluffy, about 2-3 minutes of serious mixing
- Add the wet ingredients:
- Mix in the egg, vanilla extract, and almond extract until everything's well combined
- Whisk the dry ingredients:
- In a separate bowl, combine the flour, baking powder, and salt so they're evenly distributed
- Combine everything:
- Gradually add the dry ingredients to the wet mixture, mixing just until dough comes together
- Shape creepy fingers:
- Roll about 1 tablespoon of dough into 3-4 inch logs, then use a knife to create knuckle lines
- Add fingernails:
- Gently press a blanched almond into one end of each finger to create that unsettlingly realistic nail
- Bake until golden:
- Arrange fingers 2 inches apart on prepared sheets and bake for 18-20 minutes until lightly golden
- Create the bloody effect:
- Remove the almonds, dab red food coloring or jam in the nail bed, and press almonds back in place
- Let them cool completely:
- Set up a wire rack and let the fingers cool fully before serving
 Pin It
 My nephew asked if he could serve these to his friends as an April Fool's joke, and honestly, that's the mark of a successful creepy cookie. They've become such a conversation starter that I now keep blanched almonds in my pantry year round, just in case.
Making Them Extra Creepy
One year I experimented with tinting portions of the dough pale green and gray for that undead look. The effect was disturbingly fantastic, especially when I mixed all three colors on one serving plate. Greenish gray fingers with bloody nails look like they've been through quite a haunting.
Getting the Shape Right
The secret is making each finger slightly imperfect like real ones, some curved a bit, others straighter. I've found that pressing the knife gently but firmly for knuckle lines creates the most convincing texture. Don't worry if they're not identical, authenticity is in the imperfections.
Serving Suggestions
These absolutely steal the show alongside hot apple cider or arranged around a pumpkin carving station. One year I stuck them into a graveyard dirt cake and guests couldn't stop taking pictures. They're the kind of Halloween treat that people remember and ask about for years.
- Tuck a few fingers into cupcake frosting for a surprise element
- Pair them with dark chocolate cupcakes for a dessert spread
- Keep extra red coloring nearby for touchups before serving
 Pin It
 There's nothing quite like watching someone hesitantly try their first witch finger cookie, then immediately reach for another. These have become the most requested Halloween treat in my house, and honestly, I'm perfectly okay with that.
Recipe FAQ
- → How do I create realistic knuckle details on the cookies?
-
Use a knife to gently score horizontal lines across the dough before baking. Press lightly but firmly enough to create visible indentations that will resemble knuckles once baked.
- → Can I make these witch finger cookies ahead of time?
-
Yes, you can prepare the dough up to 2 days in advance and refrigerate it. Shape and bake when ready, or freeze the unbaked fingers on a baking sheet then transfer to a bag for longer storage.
- → What's the best way to create the bloody fingernail effect?
-
After baking, carefully remove the almond fingernails, apply red gel food coloring or strawberry jam to the exposed area, then press the almonds back into place. Jam creates a gooier, more realistic blood effect.
- → Can I use different flavors instead of almond?
-
Absolutely. Replace almond extract with lemon, orange, or vanilla extract. You can also add cocoa powder for chocolate witch fingers or tint the dough with food coloring for green or gray witches.
- → How should I store these Halloween cookies?
-
Store in an airtight container at room temperature for up to 5 days. If using jam for the bloody effect, consume within 2-3 days as the moisture may soften the cookies over time.
- → Are these witch finger cookies suitable for kids to help make?
-
Yes, children love helping shape the dough into fingers and create the knuckle details. They can also help press the almond fingernails into place and add the bloody effect with supervision.