 Pin It
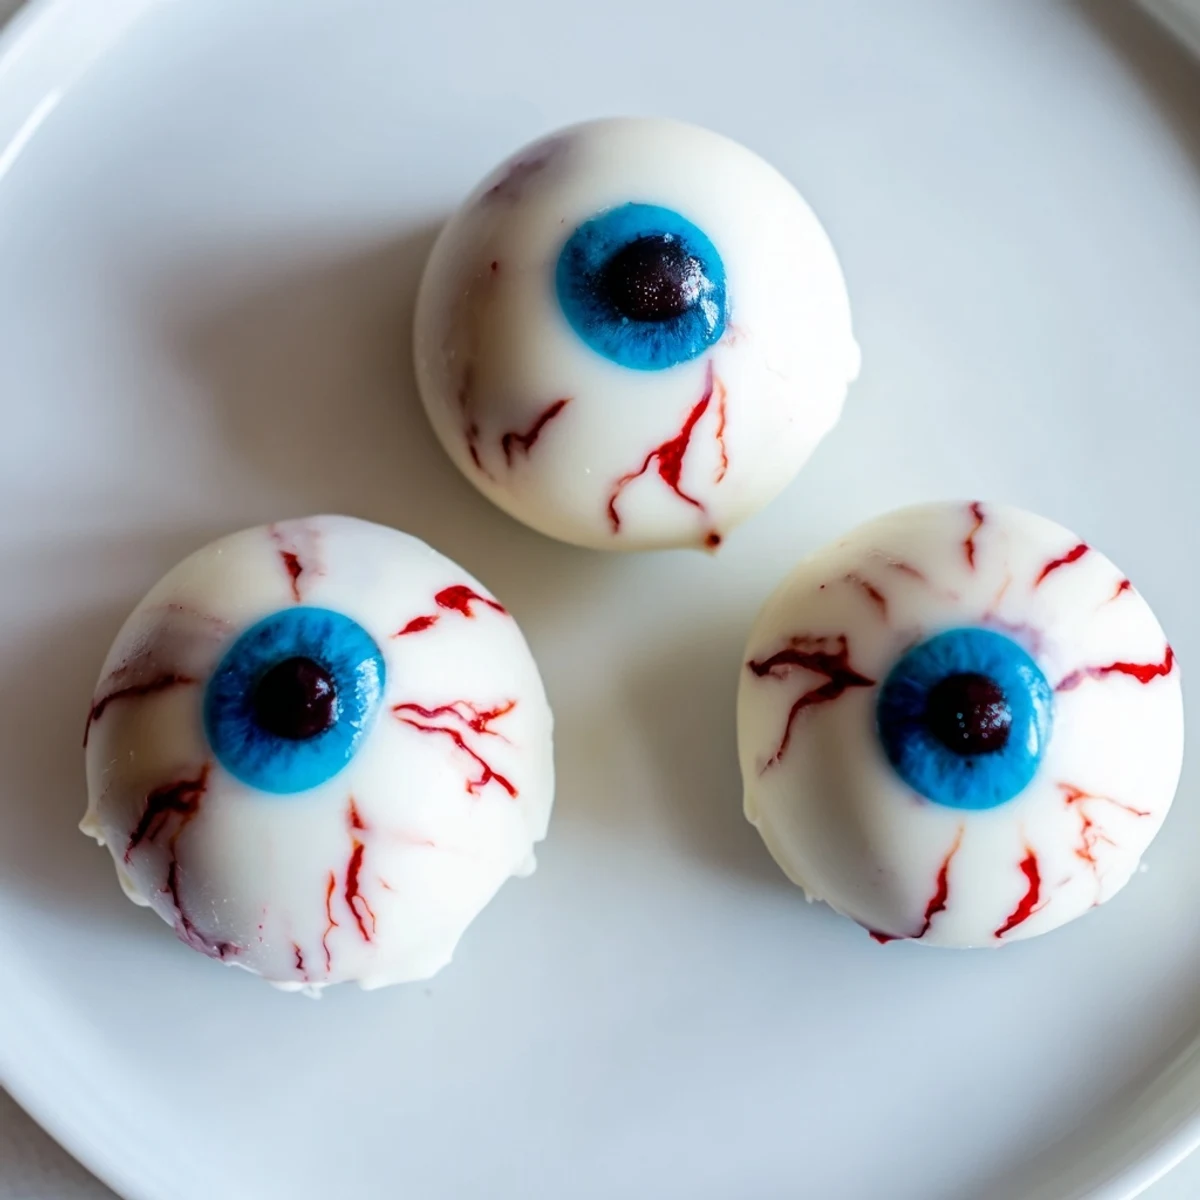
 These Halloween cake eyeballs combine crumbled vanilla cake with creamy frosting, shaped into balls and coated in smooth white chocolate. Each eyeball features a colored iris made from blue or green candy melts, with a dark chocolate pupil and spooky red gel veins for that authentic creepy look. The process involves baking or preparing a vanilla cake, crumbling it once cooled, and mixing with a rich cream cheese buttercream frosting. After chilling, the balls are dipped in melted white chocolate and decorated with colorful details. They're perfect for Halloween parties, especially when served chilled for the best texture.
The year my daughter decided she wanted the creepiest Halloween treat ever, I found myself at midnight dipping perfectly round cake spheres into white chocolate while sticky red gel decorated my countertops. Those first few attempts looked like lopsided golf balls rather than eyeballs, but somehow that made them even better. The kids at her party couldn't decide whether to scream with delight or horror before grabbing them.
Last October I made three batches for a neighborhood potluck and discovered that adults are just as delighted by these as children. My neighbor actually pretended to be afraid of them while sneaking a second one behind her back. By the time I went to pack up leftovers, the platter was completely empty except for a few smears of red gel.
Ingredients
- 1 box vanilla cake mix (or 400 g homemade vanilla cake): The foundation that creates those perfectly moist cake crumbs
- 3 large eggs: Essential for binding the cake mix properly
- 120 ml vegetable oil: Keeps the cake incredibly tender
- 240 ml water: Needed for the cake batter consistency
- 100 g cream cheese, softened: Adds tanginess that balances the sweetness
- 100 g unsalted butter, softened: Creates the rich creamy frosting base
- 200 g powdered sugar: Sweetens the filling without making it too heavy
- 1 tsp vanilla extract: Deepens the flavor beyond basic sweetness
- 400 g white chocolate or white candy melts: Forms the white of the eyeball and provides the perfect smooth coating
- 50 g dark chocolate or black candy melts: Essential for creating realistic pupils
- 50 g blue or green candy melts OR colored icing: Gives your eyeballs their eerie irises
- Red gel food coloring or red decorating gel: Creates those spooky bloodshot veins that make them unsettlingly realistic
Instructions
- Bake your foundation:
- Preheat oven to 180°C and prepare the vanilla cake according to package instructions, then let it cool completely until you can handle it without burning your fingers
- Create the crumbs:
- Break the cooled cake into a large bowl and crumble it until you have fine, consistent pieces with no large chunks remaining
- Make the creamy filling:
- Beat together the cream cheese, butter, powdered sugar, and vanilla extract until the mixture is smooth and silky
- Form the eyeballs:
- Mix the frosting with the cake crumbs until combined, then scoop tablespoons and roll them into 24 smooth balls before placing on parchment paper and freezing for 20 minutes
- Coat them white:
- Melt the white chocolate gently and dip each chilled ball, fully coating it before returning it to the tray
- Add the iris:
- While the white coating is still soft, pipe or dip a small amount of colored candy melt in blue or green onto the center of each ball
- Create the pupil:
- Once the iris has set, add a small dot of dark chocolate or black candy melt in the center for that staring effect
- Make them spooky:
- Use red gel to draw jagged little veins around each eyeball, creating that bloodshot look that makes people hesitate before eating
- Let them set:
- Allow all decorations to firm up completely before serving so they maintain their creepy shape
 Pin It
 After years of making Halloween treats, these eyeballs have become the one thing my friends actually request months in advance. There is something uniquely satisfying about serving food that makes people laugh nervously before they take a bite.
Making Them Creepier
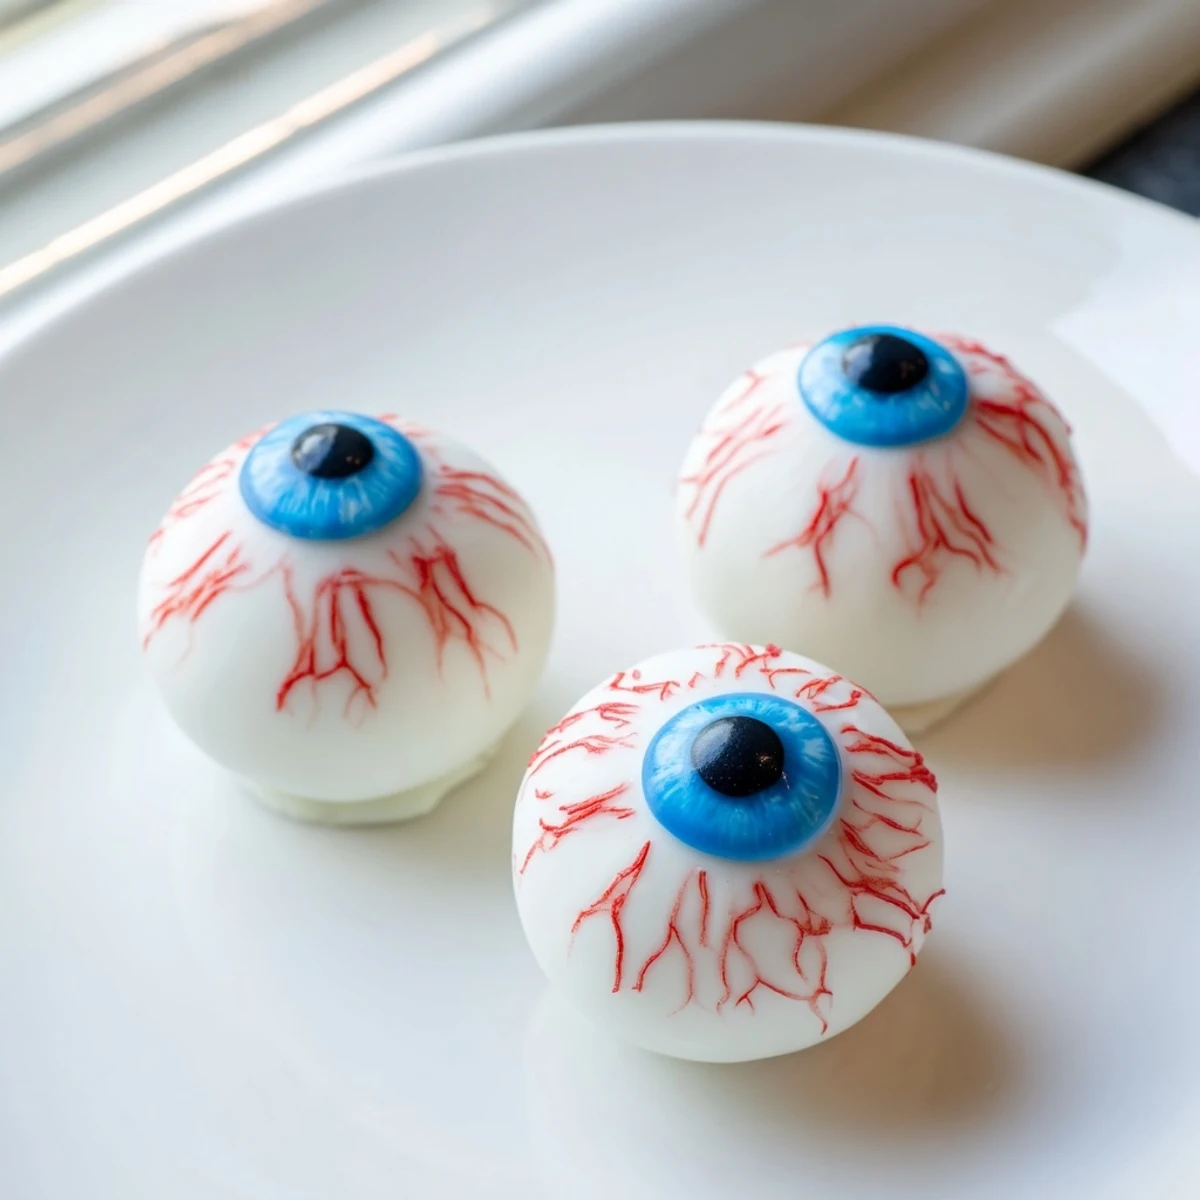
The trick to really selling the eyeball effect is varying the iris placement so they do not all look perfectly uniform. I learned this accidentally when my hand slipped during one batch and suddenly they looked like they were watching you from different angles.
Flavor Variations
While vanilla creates the perfect blank canvas, I have experimented with chocolate cake bases and red velvet for an even more dramatic appearance. The red veins look particularly unsettling against red velvet crumbs that peek through the white coating.
Storage And Serving
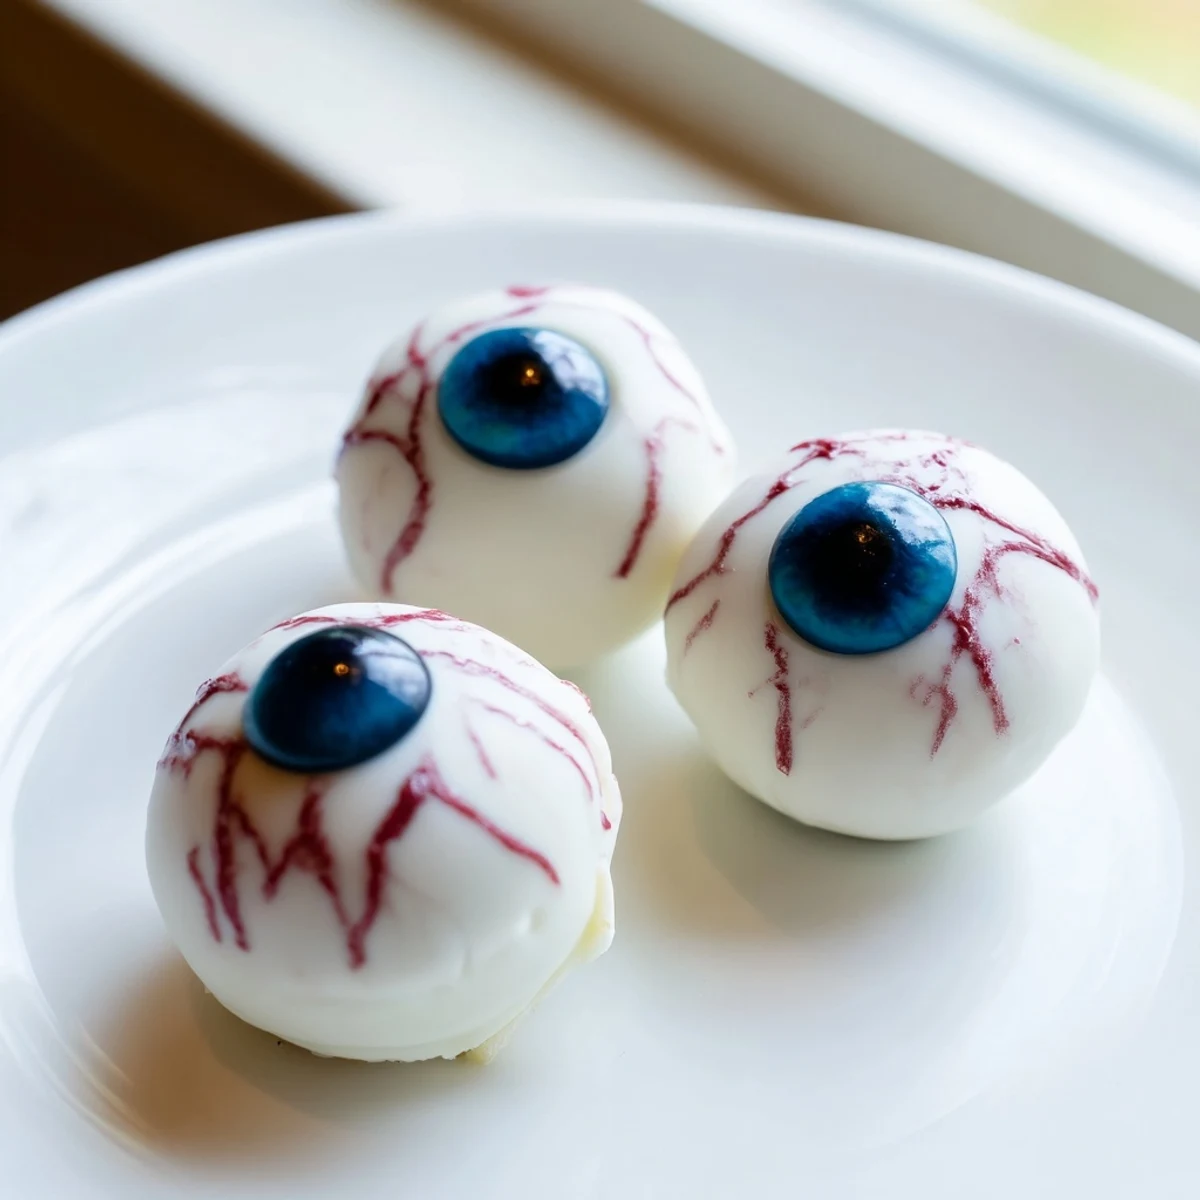
These Halloween treats actually taste better when chilled, which conveniently helps them maintain their perfectly round shape. Serve them on a dark platter for maximum contrast and watch how quickly they disappear despite their creepy appearance.
- Store in the refrigerator in an airtight container for up to five days
- Make them up to two days ahead and decorate the day of your party
- Keep them chilled until serving time for the best texture
 Pin It
 There is something delightful about serving food that makes people question whether they should really eat it. These eyeballs strike that perfect balance between creepy and delicious that defines Halloween entertaining.
Recipe FAQ
- → How far in advance can I make these Halloween eyeballs?
-
You can prepare these up to 2 days ahead. Store them in an airtight container in the refrigerator. The coating will stay fresh and the decorations will remain intact. For best results, add the red gel veins on the day of serving to prevent smudging.
- → Can I use a different cake flavor instead of vanilla?
-
Absolutely! Chocolate cake works wonderfully for a darker eye effect. Red velvet creates a spooky contrast when you bite into it. You can also use brownies for a denser, fudgier texture. Just ensure the cake is completely cooled before crumbling.
- → What if I don't have candy melts for the colored iris?
-
You can use colored icing or frosting instead. Gel food coloring mixed with a bit of white chocolate also works. Another option is to use melted chocolate colored with oil-based food dye. Water-based coloring will cause the chocolate to seize.
- → Do I need to use cake pop sticks?
-
No, sticks are optional. These work perfectly as handheld cake balls without sticks. If you prefer using sticks, insert them before chilling the balls, then dip carefully holding the stick. This makes them easier to serve and display.
- → How do I prevent the chocolate coating from cracking?
-
Ensure the cake balls are thoroughly chilled before dipping. The contrast between cold filling and warm chocolate can cause cracks if the balls aren't cold enough. Work quickly when dipping and avoid overhandling while the coating sets.
- → Can I freeze these Halloween eyeballs?
-
Yes, freeze undecorated dipped balls for up to 1 month. Thaw in the refrigerator before adding the final decorations like veins and pupils. Once fully decorated with gel, they're best enjoyed within 3-4 days when stored refrigerated.